We bought a standard Pössl Roadcruiser 640 from 2011 from its first owners, and over the years we’ve changed eleven things about it. Together that cost us around €2,880. If we were starting over, we’d do the Maxxfan first.
When we bought our camper from its first owners, we basically got a ‘bare’ factory camper. The previous owners hadn’t changed a thing, everything was standard. That suited our needs at first, but after our first trip (to Morocco) we quickly noticed there were things we wanted to change. Because of that, life in the camper has become a bit more comfortable, and we can also stay off-grid for longer.
Everything below has been tested in 40 degrees in Greece and in -20 degrees in the snow while winter camping in Switzerland.
1. Maxxfan
After our trip to Morocco with 35+ degree heat, we found out that heat doesn’t leave the camper very well in the evening. Opening windows helps, but you’re dependent on the wind. If there was no wind, there was no way for us to get the temperature down enough to sleep comfortably. So we installed the Maxxfan fairly quickly.
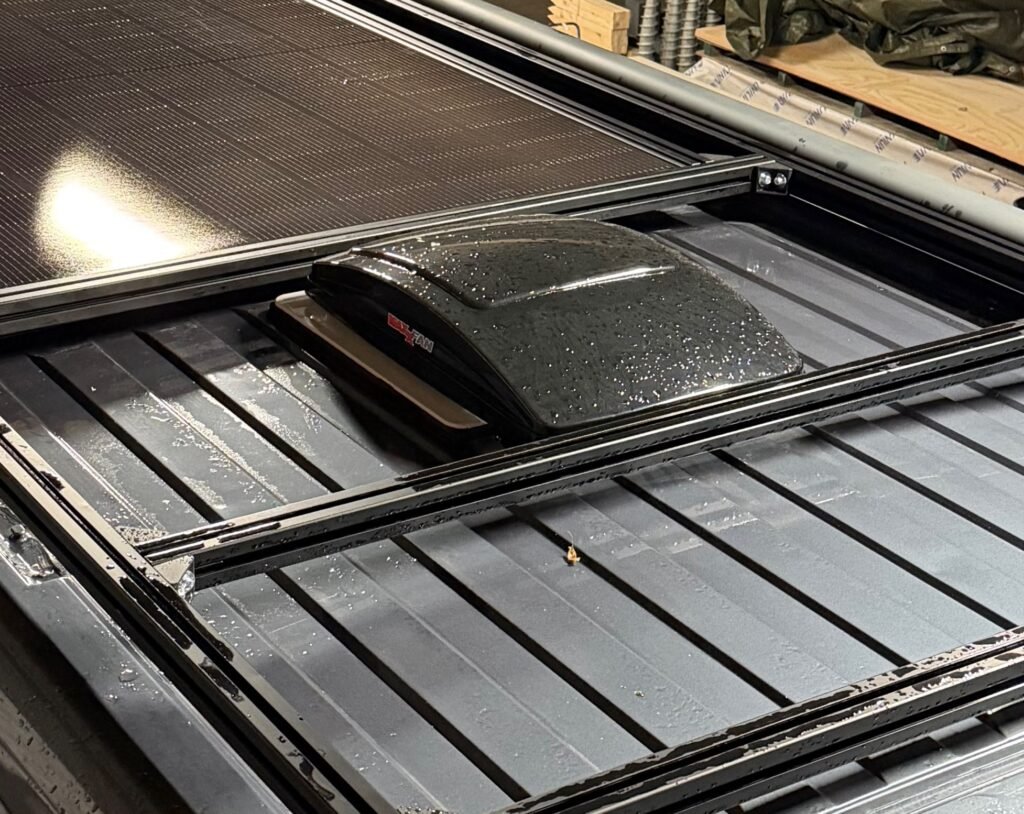
We installed it ourselves. That was a relatively simple job, because there was already a roof hatch of the same size (Heki mini 40×40) in that spot. We carefully removed it, and glued the Maxxfan into the resulting opening. A Saturday afternoon job. The fan itself cost €300, and if you have it installed by a camper specialist, you’re quickly looking at 700 to 800 euros for the fan and installation combined.
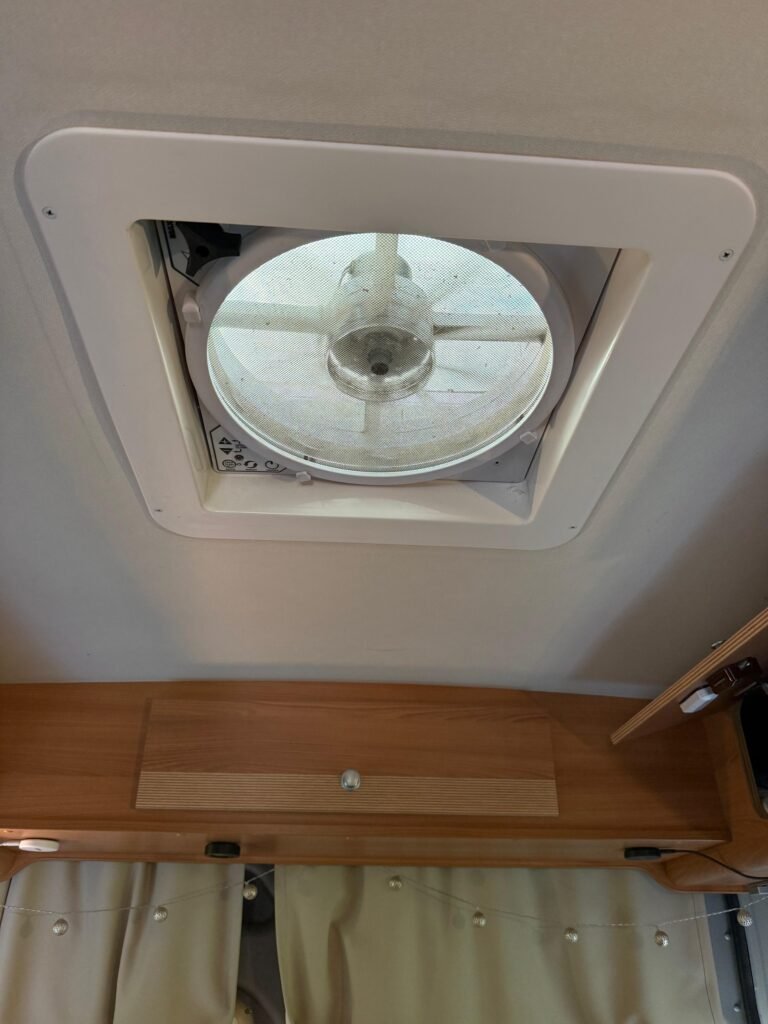
It runs 24/7 in summer, and on the lowest setting in winter to keep condensation down. Of all eleven upgrades, this is the one we notice the most.
2. Radio on the leisure battery
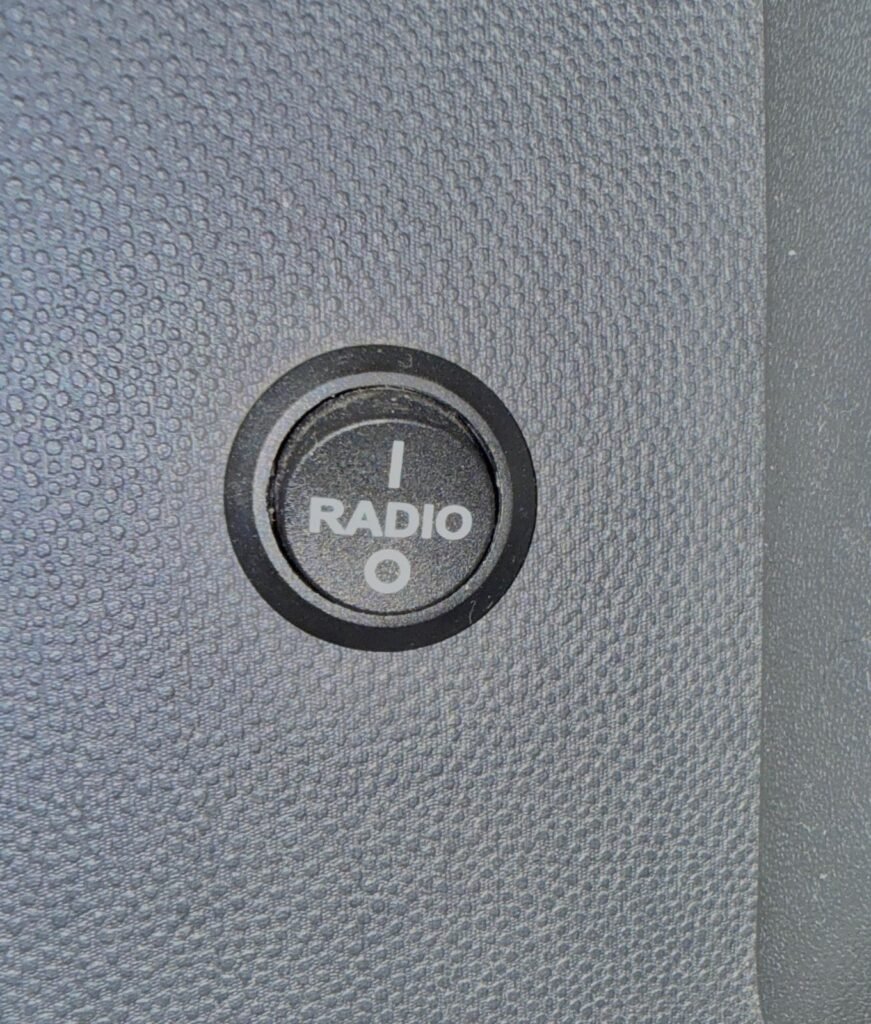
We had a button installed that lets us just switch on the van’s radio using the leisure battery. We’d already replaced the speakers and had a small sub installed, so with this button we can now watch films with great sound. The radio is also on a lot more during the day now.
3. Mirrors from IKEA
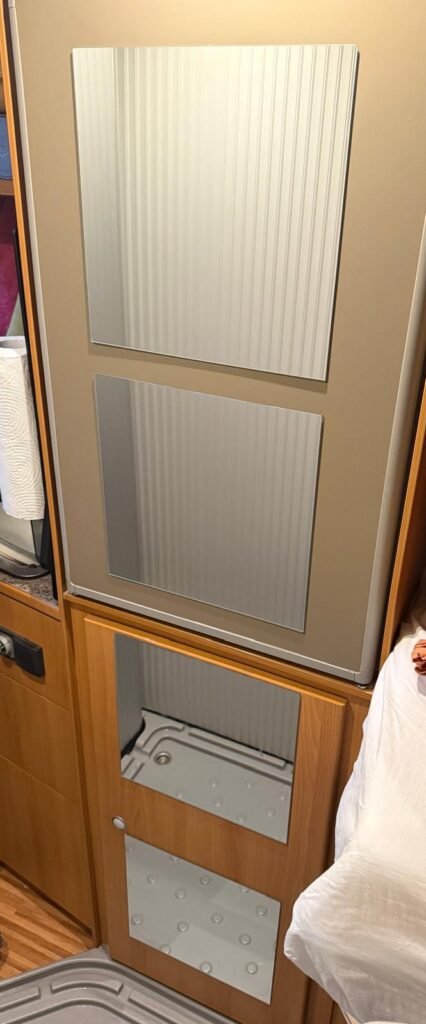
A problem in a lot of campers: nowhere to fit a big mirror where you can see your whole self. We ended up solving this by sticking four small IKEA mirrors onto the cabinet and fridge. That created a kind of full-length mirror, and honestly, it works pretty well.
It’s the BLODLÖNN, €3.99 for the set. We stuck them on with the included adhesive strips, and they’ve been up for several months now without a single one falling off.
4. Extending the bench seat
And then there’s the bench seat in a camper van. We don’t like sitting on it much, because you can’t really lounge on it. If you sit across it, you can’t rest your legs properly; the seat is just a bit too short.
We solved this by putting a 6 mm plywood board under the existing cushion. We can then slide it out towards the aisle, creating space to add an extra piece of cushion. We cut a leftover piece of foam to size and wrapped a cushion cover around it. On the end of the board we glued a corner profile so it holds the storage lid in place.
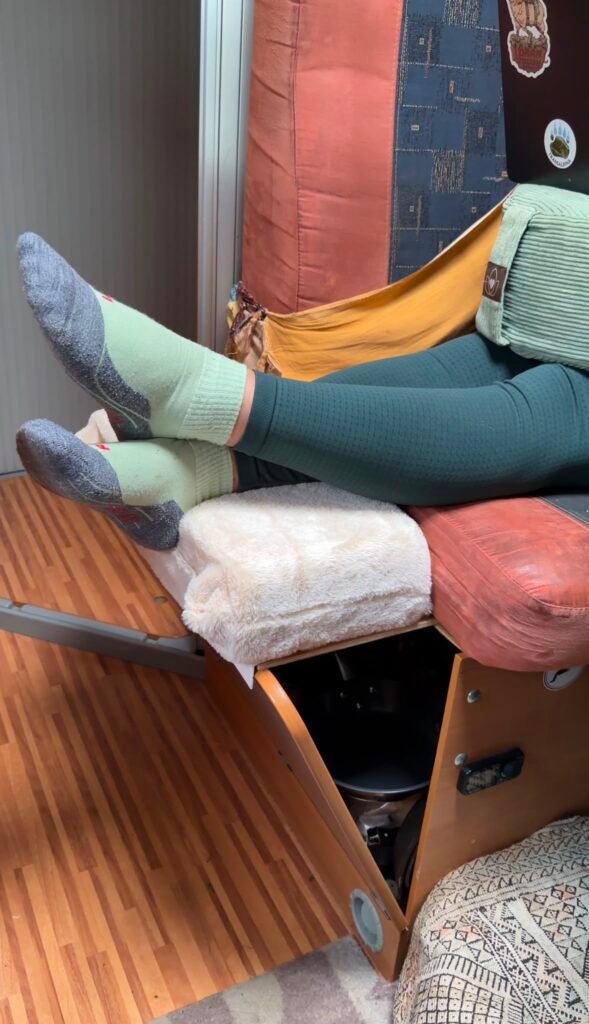
The bench is now about 20 cm longer, and in our case that’s exactly enough to actually rest your legs comfortably.
All in all, this upgrade cost us less than €20, and we’re really happy with it!
5. Solar panels and an extra battery
Our biggest wish since buying the camper was an overhaul of the power system. We chose to install a 465 Wp panel and replace the old leisure battery with two Victron AGM batteries of 90 Ah each.
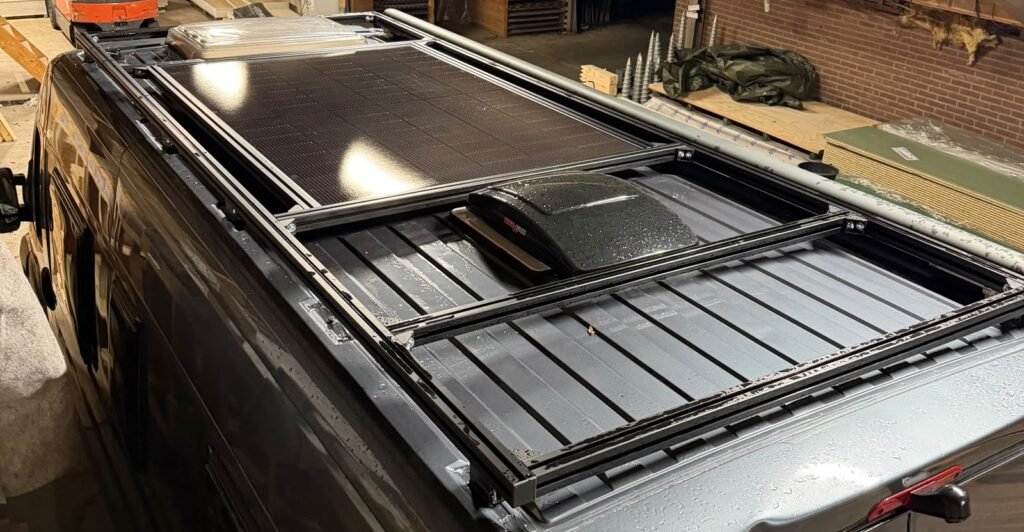
The panel cost €60, the batteries €204 each, the MPPT controller €240, the cables around €80, and having an expert connect it all cost us €120.
What it gets us: where we used to need to find a power hookup after 2-3 days, we now stay off-grid indefinitely, as long as there’s at least some sun.
Why we didn’t switch to lithium
We would have loved to make the switch to lithium batteries, but since our existing charger in the EBL wasn’t suitable for that, we just stuck with lead.
A factory camper usually has an EBL, an electrical control box that combines the charger, fuses and distribution in one unit. Handy, but the charging profile is tuned for lead. Lithium batteries need a different charging pattern and a different end voltage, so with a lead charger on top, you’ll never fully (or correctly) charge a lithium battery.
Ours has a Schaudt EBL 99 built in. To switch anyway, you’d need a separate DC-DC charger (to charge while driving) and a mains charger. Both cost around €300 each, and on top of that lithium batteries are also pricier than GEL or AGM batteries. We didn’t think it was worth it, partly because our batteries are pretty much always full thanks to the large solar panel.
Want to work out how many Wp and how many Ah you need yourself? You can use our solar panel calculator.
6. 3D prints
Our 3D printer has been working overtime, since we’ve printed a huge number of handy things for in and around the camper.
Think magnetic hooks, a grey water level indicator, and cup holders.
There are too many to list here; the best way is to check them out one by one in our 3D print blog post.
7. Custom-cut floor mat
The whole floor of our camper is vinyl: super easy to keep clean, but you do need a mat to dry your shoes on. Because the aisle in our camper is very narrow, we’d originally only put down a small mat by the entrance. We soon found out that wasn’t ideal: it slides around everywhere, and you can’t fit two or three pairs of shoes on it to dry at once.
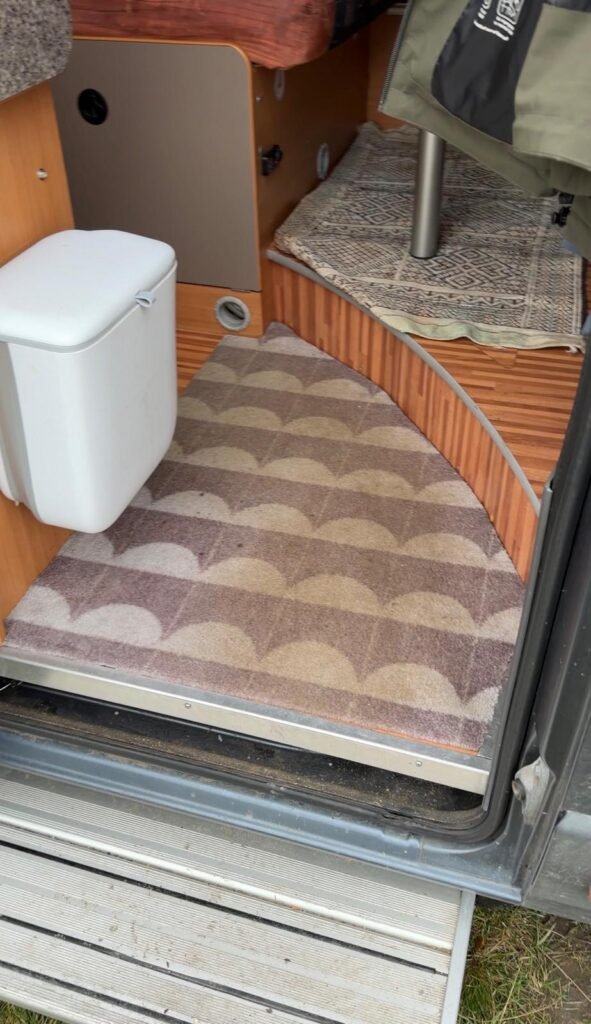
We ended up solving this by buying a large entrance mat at Kwantum and cutting it to size ourselves. The surface area more than doubled compared to the small mat we had before. Ideal in wet weather, since there’s now enough room to step into the camper and take off your shoes on the mat. That keeps the rest of the camper nice and clean.
The mat cost around €30. Cutting it is easy with a good sharp pair of scissors or a knife; the edge holds up surprisingly well and doesn’t fray.
If you travel with a dog, the same mat also works great as a spot to dry them off. We wrote more about that in our blog on traveling with a dog in a camper van.
8. IKEA pegboard
Storage is scarce in a camper. So we put two IKEA Skådis pegboards on the empty walls we had. There’s a huge range of accessories available for these pegboards. You can hang all kinds of handy bins and hooks on them, or hang up nice photos with the clothes pegs.
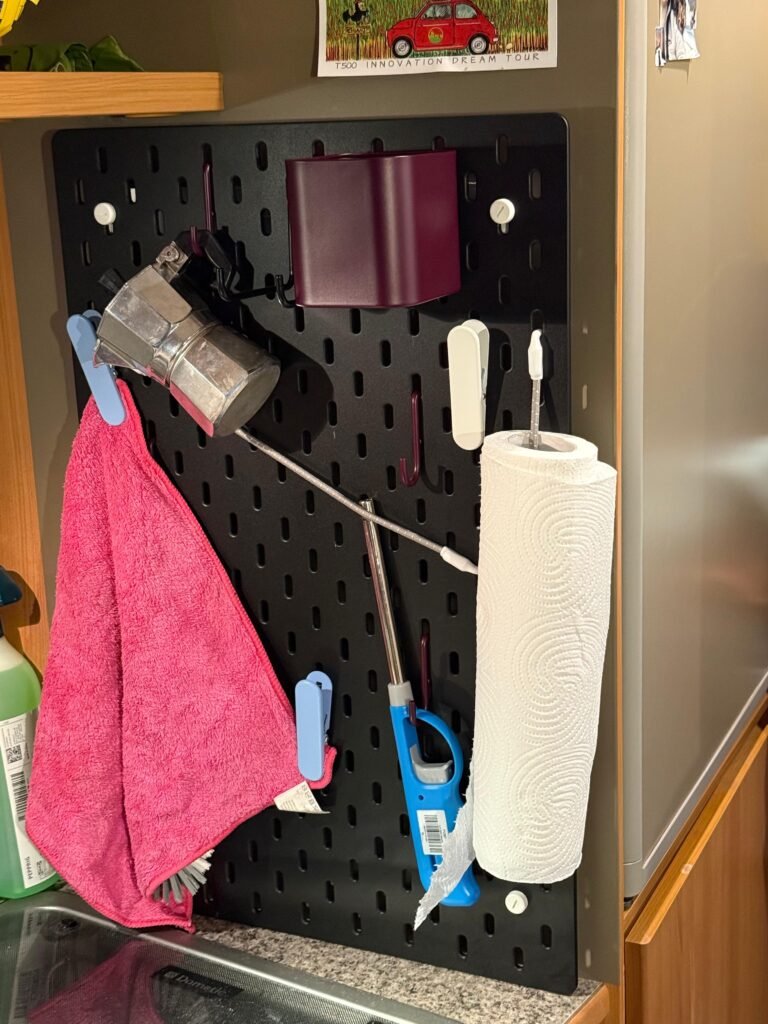
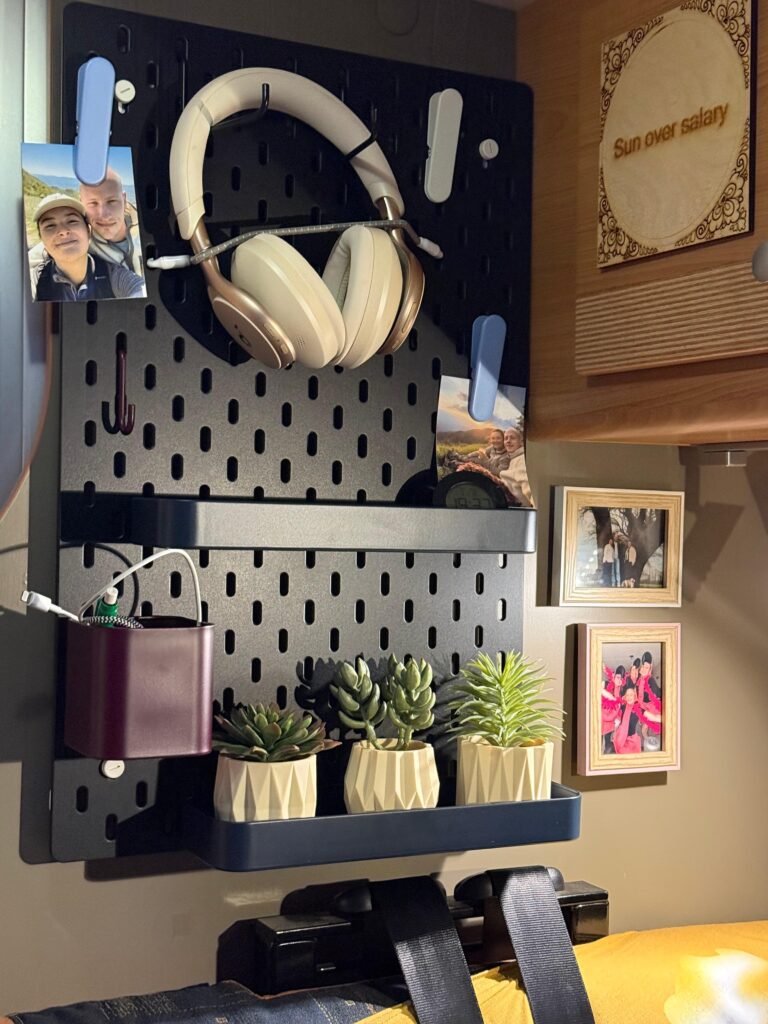
We used the 36×56 cm size. The boards are €16.99, and you can already get an accessory set for €9.99.
And the question you’ll get: does everything stay in place while driving? Yes, nothing has fallen off so far, and we’ve been over plenty of bumpy roads!
9. Extra power outlets
Our camper is from 2011, and you can tell from everything that we didn’t carry nearly as many devices back then. There wasn’t a single power outlet in the whole camper that worked while off-grid. The cabin obviously has the regular 12V cigarette lighter socket, but that only works with the ignition on.
So we added two 12V USB-A and USB-C charging points by the bed, which we connected to the existing lighting circuit. Just make sure you check how that circuit is fused.
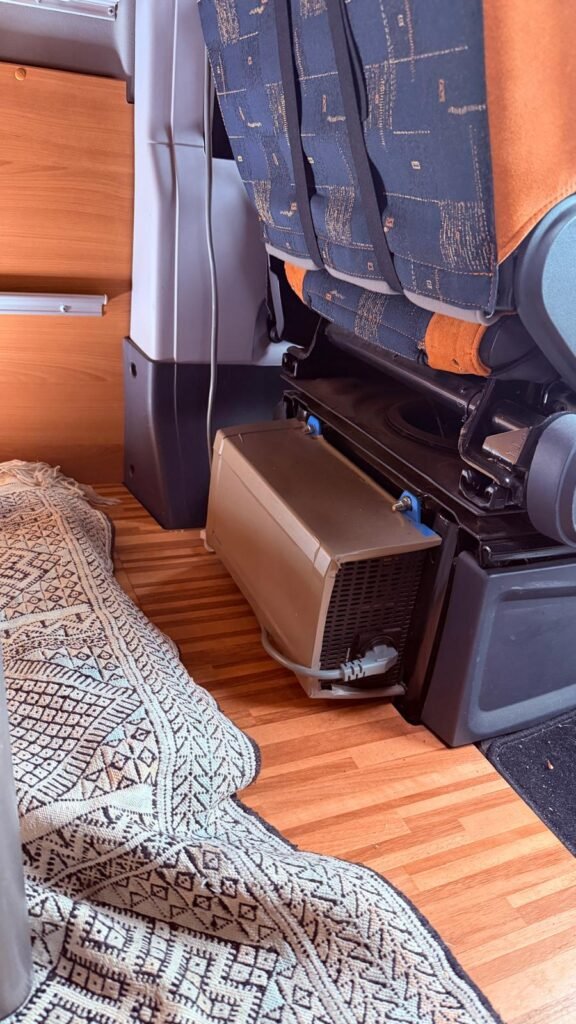
We also installed a 12V to 230V inverter, so we can just use our regular 230V appliances. We went with a Victron Phoenix 12/1200 inverter, which lets us connect up to 1000W of devices in total. In practice we almost never do that, since pulling 1000W would drain our batteries within an hour.
This inverter cost us €222.
10. Diesel heater
The diesel heater, or “Standheizung” as it’s often called. Like most caravans and campers, ours also has a Truma Combi boiler running on gas. But the downside of gas heating is that on cold days you can end up swapping your gas bottle every 2 to 4 days, depending on the temperature, because it’s empty again. That’s not just an expensive habit, it’s also a real hassle if you’re staying at a campsite in a ski resort for a week, for example. Bringing four gas bottles from home isn’t exactly practical either.
Since we also love winter camping in the van, this upgrade was a no-brainer for us.
We went with an Autotherm 2kWh. Installation by a specialist plus the unit itself cost us €1,315 combined.
Fuel use comes down to roughly 0.5-1L per night, depending on which setting you run it on. Where we used to go through 1-2 gas bottles a week during winter camping, it’s now just a few liters of diesel.
Want to work out how long your gas bottle will last based on how you travel? You can calculate that with our gas consumption calculator.
11. Replacing the sliding door handle
You open the sliding door of a Ducato from the inside with a small standard handle. It works, but there’s little room for your fingers and hardly any leverage, so you end up pulling harder than you should. For us, closing it was especially annoying, since the handle sits tucked away behind the kitchen unit.
We replaced it with the Womofix EasyGrip. It’s about 14 centimeters long and sticks out roughly a centimeter further from the wall, so you can grab it with your whole hand. There’s a lip at the bottom to pull the door shut with, and for us that’s the difference.
Fitting it is a five-minute job: the original screw and mounting point stay in place, all you need is a 5 mm Allen key. It fits the Ducato, Boxer and Jumper from 2006 onward.
We wrote a separate blog post about it with photos of the install: replacing our camper’s sliding door handle.
What it all cost
| Upgrade | Price | Did we do it ourselves? |
|---|---|---|
| Maxxfan | €300 | Yes |
| Radio on leisure battery | Unknown (included in radio install) | No |
| IKEA mirrors | €3.99 | Yes |
| Bench seat extension | €20 | Yes |
| Solar panel + batteries | €908 | Partly (connected by an expert) |
| 3D prints | ~€12 | Yes |
| Floor mat | €30 | Yes |
| IKEA pegboard | €26.98 | Yes |
| Extra power outlets | €234 | Yes |
| Diesel heater | €1,315 | No |
| Womofix sliding door handle | €30.64 | Yes |
Frequently asked questions
This blog post contains affiliate links. If you buy something through one of these links, we earn a small percentage, you don’t pay anything extra. These are products we use ourselves.